


The good news is this: You don’t need to copy and paste from RSS feeds into WordPress. That’s slow, boring, and easy to mess up. There’s a better way, and it only involves a few clicks.
In this post, I’ll show you how to pull content from any valid RSS feed and turn it into WordPress posts. We’re using one plugin. It’s simple, no custom code needed, and no weird settings that no one understands. You just add the feed URL, and the plugin does the rest.
This is for anyone who wants to repost articles, collect updates from other sites, curate content from an industry, or build a content hub that runs itself.
Let’s set it up:
The plugin that’s going to do all the magic is called Feedzy.

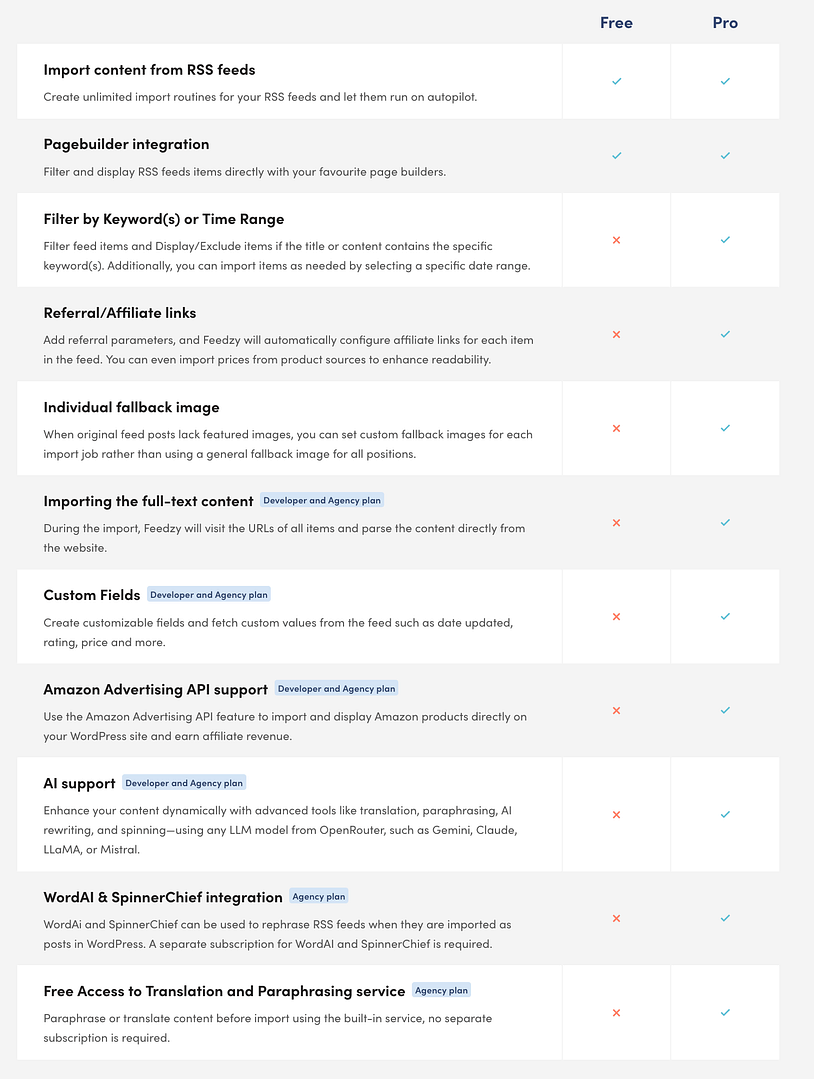
Feedzy has two versions: free and pro. The free version lets you display the full contents of an RSS feed as a list of links/articles – you can add that to either a page, sidebar, etc. However, if you want to take individual feed items and add them as single blog posts, you’ll need the pro version of Feedzy to pull that off (starts from $99 per year).
Click here to see the complete list of differences between Feedzy free vs pro:
Bonus: Video tutorial
If you’d prefer to learn how to do this in video form, here’s a quick tutorial I created:
Step 1: Install Feedzy and activate your license
To get started, you need to install both Feedzy and Feedzy Pro. Feedzy Pro actually functions as an add-on, so it needs the free version to operate.
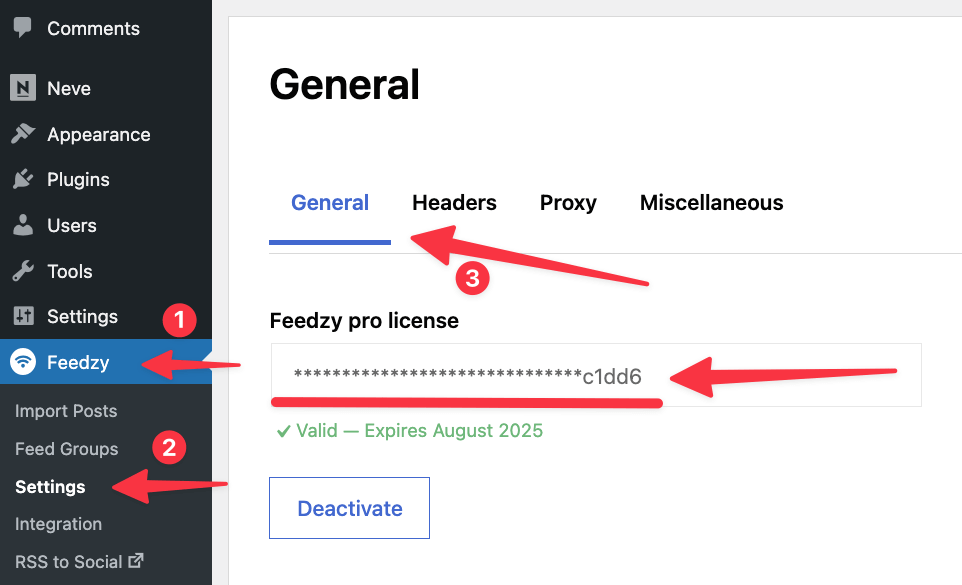
Once you have both plugins installed and activated, head to Feedzy → Settings (the General tab) and enable your Feedzy Pro version (you can find your license key in your Themeisle account).
Next up, you’re ready to specify the RSS feeds you’d like to import WordPress posts from.
Need help finding a valid RSS feed address?
Here are a few tips:
- For WordPress blogs, you can almost always append
/feedto the end of a URL to get the RSS feed. - Many sites with RSS feeds display the RSS feed icon (you can see an example of the RSS icon in the Feedzy graphic from the previous section).
- You can view a site’s source code with your browser’s developer tools and search for “rss” in the code.
Then, to make sure you’ve found a working RSS feed, you can use this free RSS feed validation tool.
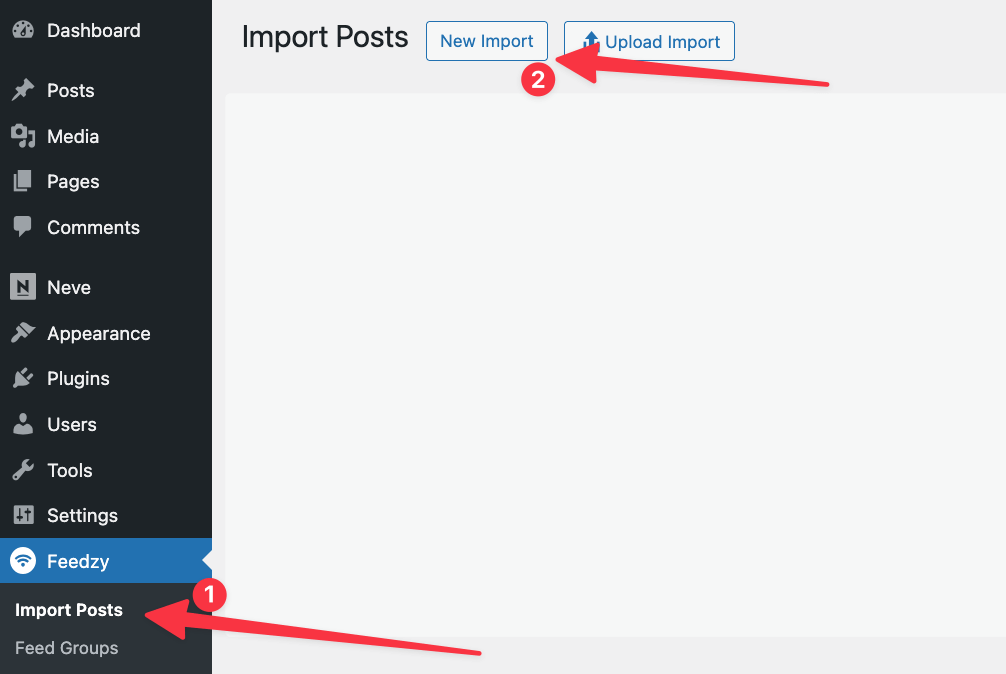
Once you have the feed(s) that you’d like to import, head to Feedzy → Import Posts and click on New Import:
Give it a name so that you can remember what you’re importing and paste the RSS feed URL into the box. You can separate multiple feed URLs with commas:

- Add a name for your import
- Add your feeds – can be multiple ones
- Click on the “+” icon
👉 If you don’t want to play around with any of the other settings that this plugin comes with, the you can click on Save & Activate Importing even now. Feedzy will take the RSS feeds that you’ve provided and start fetching content from them. 🍾
If you want to customize how the import is being carried out, read on:
Step 3: Add filters to your feed
One neat thing about Feedzy is that it lets you add keyword filters to your RSS feeds. With these filters, you can either:
- Only import posts that include certain keywords
- Import all posts EXCEPT those that contain certain keywords
You don’t need to use these filters, but they’re a good way to get some control over exactly when to import RSS feeds into WordPress as posts.
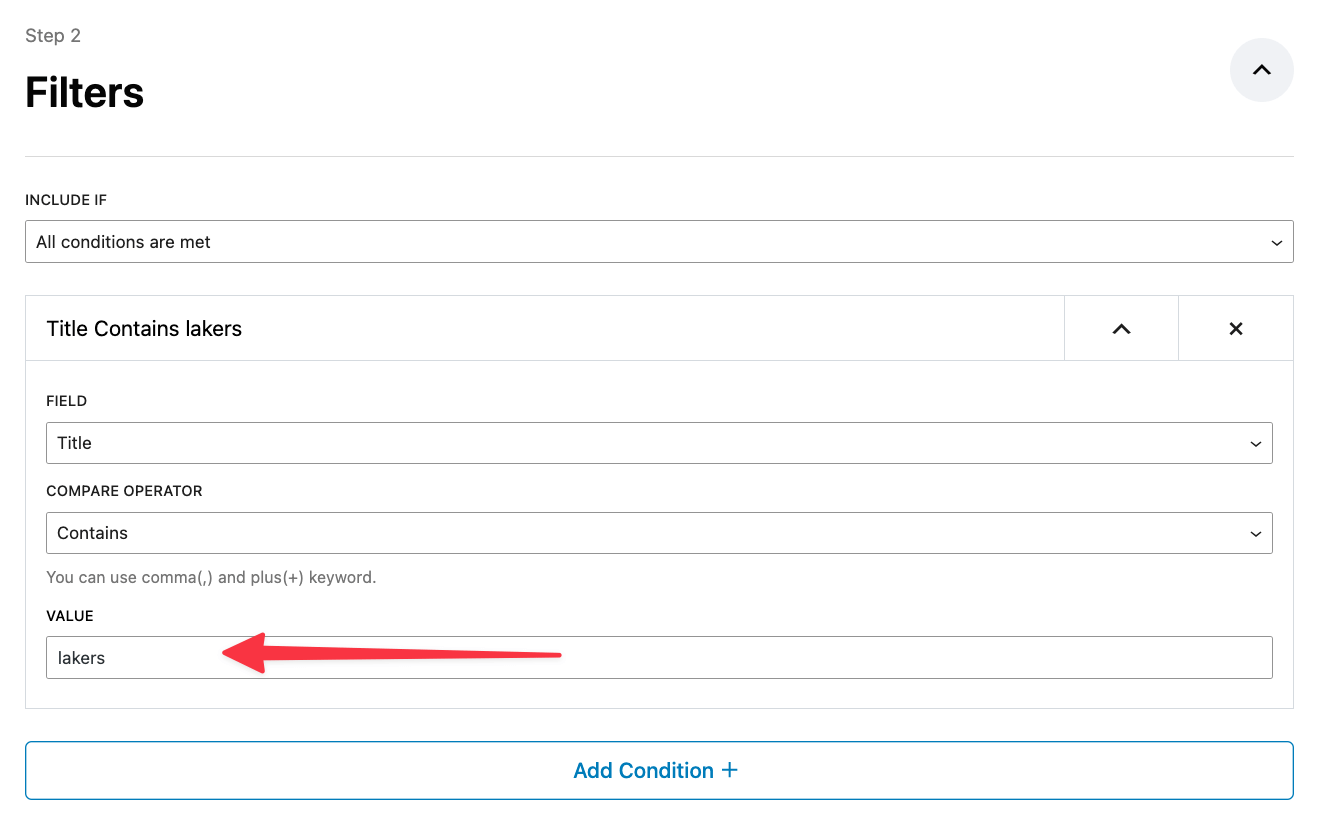
In the Filters section, enter your keywords as desired. For example, with the example configuration I created below, Feedzy will import only the posts that cover the Lakers in some way (remember we’re fetching an NBA news feed):
Step 4: Map feed items to WordPress content
This is where you can pick how you want your fetched content to be saved.
First off, pick the content type that you want to use. Default is “post.”

Then, you can select the categories to be used when saving the content and the default status – Draft or Published.

The next sub-sections start to get interesting because you can craft the way in which Feedzy will create the titles, the dates it’ll assign to this new content and also tweak the body content itself of the feed if needed.

For example, as you can see in the image above, you can pick from a number of variables when saving content – such as the original title, author, date, etc.
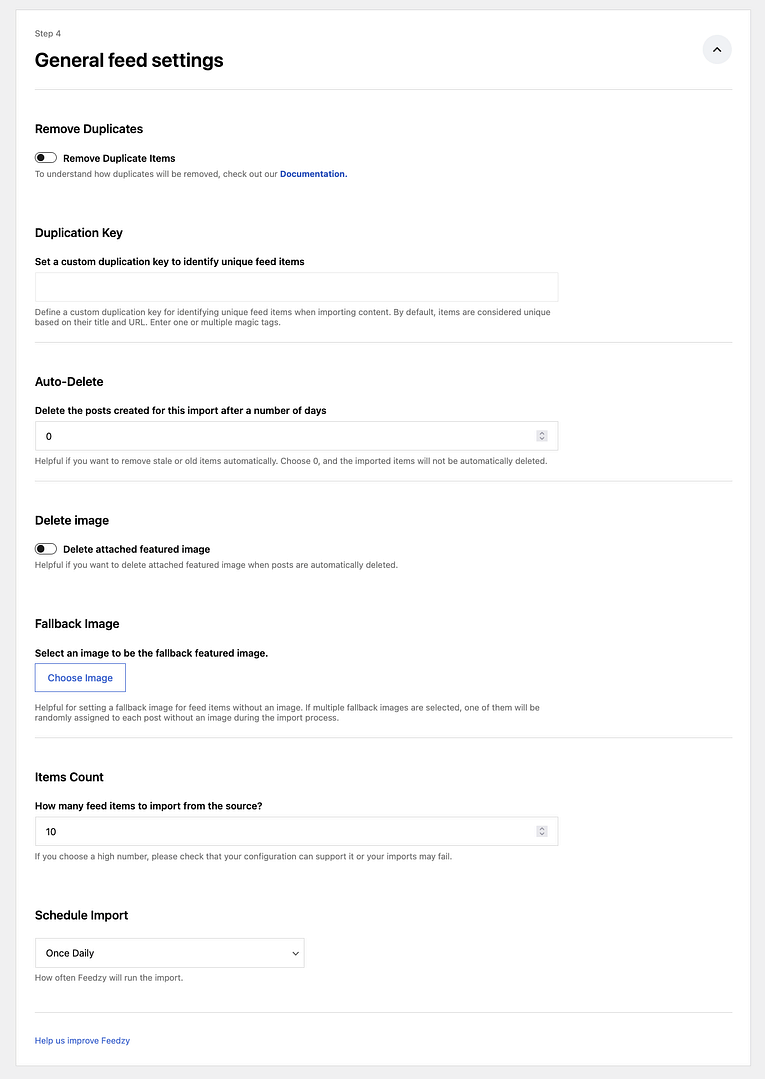
Step 5: Fine-tune the general feed settings
This final sub-section allows you to really tailor the import to match your site’s needs. You can find things like duplicate prevention here, auto-deletion (for old content), and more.
I’m just going to show you the screenshot that handles all those features so you can get an idea of what’s possible.
Click to see all the feed settings available:
Save your import and see it do its magic
This is it…all you have to do now is click that shiny Save & Activate Importing button.

When you go to Feedzy → Improt Posts now, you’ll see your import there. You can force it to run now or wait a while for Feedzy to fetch content on its own (happens once every hour).
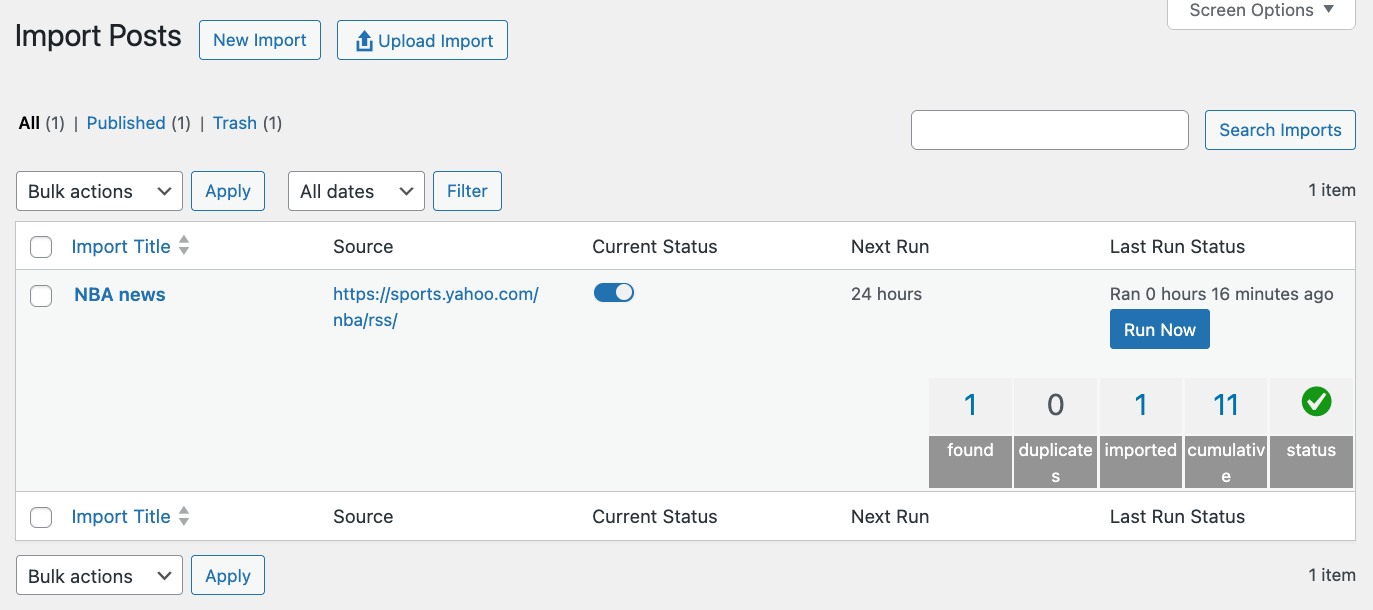
You will also see the tally of how many posts you’ve imported so far (image above).
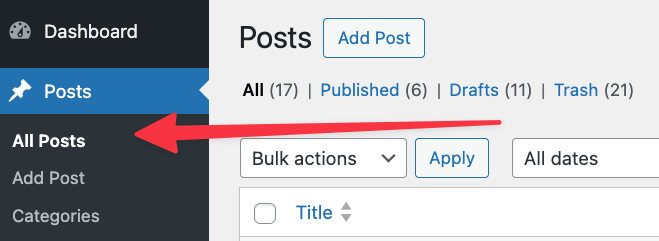
To see your newly fetched posts, just go into Posts – it’s where you can usually find all WordPress posts. 😉
Wrapping things up
With Feedzy, it’s easy to import RSS feeds into WordPress as posts. All you need to do is:
- Choose the RSS feed(s) you want to pull content from
- Set up keyword filtering (optional)
- Map the content from your RSS feed to your WordPress posts’ details
And then Feedzy will automatically check for new posts every hour and import them to your blog.
Have any questions about importing RSS feeds as WordPress posts? Leave them in the comments and we’ll try to help out!

FREE GUIDE
4 Essential Steps to Speed Up Your WordPress Website
Follow the simple steps in our 4-part mini series and reduce your loading times by 50-80%. 🚀
Yay! 🎉 You made it to the end of the article!